

Keep a promising concept moving
The store concept is taking shape. Then comes a familiar request: “Could we see the display tables in a lighter wood?” Fix Render lets you upload an existing image and describe that revision. It generates an edited take you can inspect, refine, or download.
Use it to explore material finishes, lighting treatments, colours, and visual details in retail concepts. You can start with an image without creating a project first. Each request works from the image you have selected, so you can work through feedback one decision at a time.
These are AI image edits. A result can change details beyond the requested adjustment, so compare it carefully with your source before including it in a client presentation. Fix Render does not update a CAD drawing, a measured fixture specification, or the editable geometry in Design Studio.
Make your first edit
1. Open Fix Render and upload your image
Choose Fix Render from the dashboard or sidebar. Select the upload area and choose a PNG or JPG. The current upload control accepts files up to 25 MB and optimizes large files automatically. Use a clear image where the fixture or surface you want to change is easy to identify.
2. Describe a specific change
Write what should change, where it is in the image, and the appearance you want. Add the most important things that should stay consistent. A short, precise instruction is easier to review than a request to “make everything better.”
3. Choose your takes and generate
Choose one, two, or three takes. Start with one for a straightforward correction; use multiple takes when you want alternatives. Each take costs 20 credits, shown below the controls before you run the edit. Free accounts start with 50 credits; see plan details for monthly credits.
Select Generate. The workspace shows progress while it processes your request, then adds the completed take to the edit history.
A real material-change example
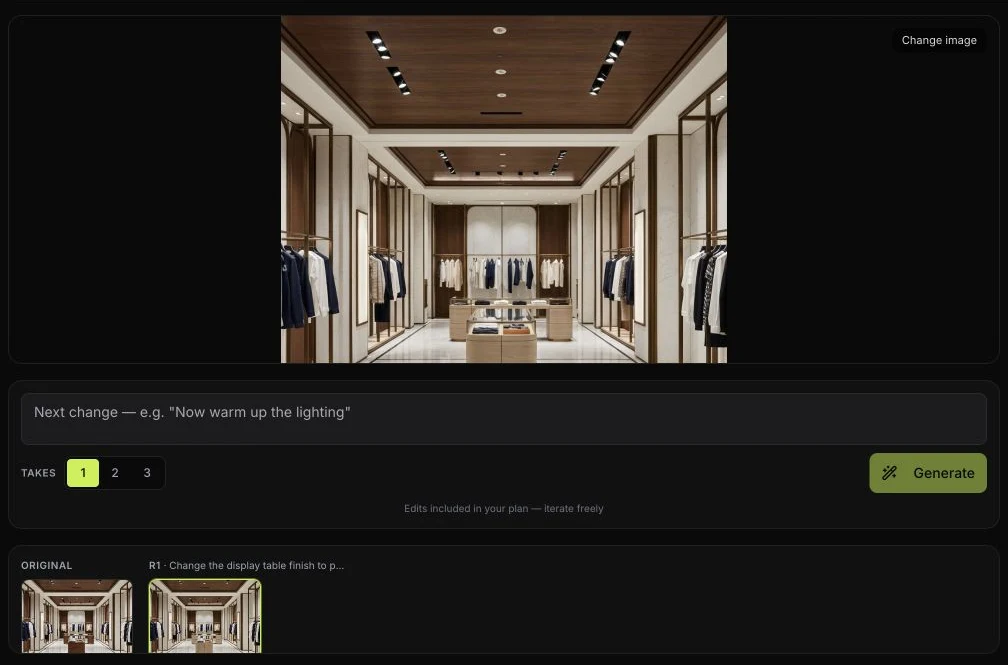
For this walkthrough, we uploaded a sample boutique concept with dark wood display tables and used this instruction:
Change the display table finish to pale oak. Keep the camera angle, store layout and surrounding fixtures consistent.
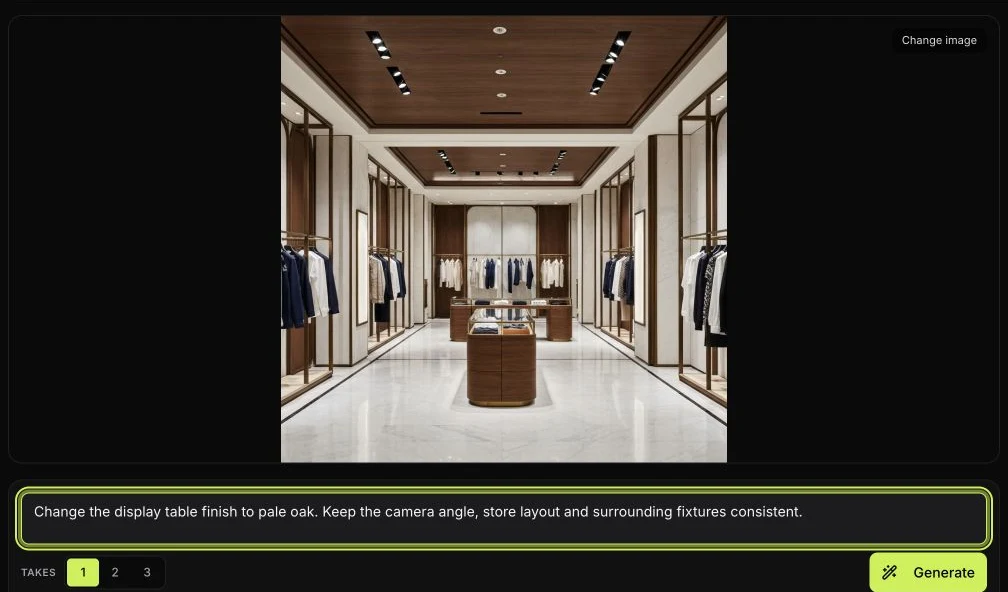
The generated take changed the visible display tables to a paler wood finish and appeared beside the original in history. This shows a real product result, rather than a separately illustrated before-and-after. It is one example, not a promise that every request will preserve every surrounding detail.
Write a useful revision prompt
A good structure is object + location + change + constraints. Name the target clearly, especially when a store contains several similar fixtures.
- Fixture finish: “Change the front central display table to matte white laminate. Keep its shape, position, and the surrounding floor consistent.”
- Lighting: “Give the rear merchandise wall a warmer lighting treatment. Keep the wall finishes and product arrangement consistent.”
- Counter material: “Show the checkout counter on the right in pale limestone. Keep its outline, camera angle, and nearby fixtures consistent.”
Treat these as starting prompts, not guaranteed outcomes. Request one decision at a time, then inspect the result. If a precise colour, brand mark, or fabrication detail matters, confirm it against the approved source material separately.
Review, refine, and download
Use the original thumbnail to revisit your starting image. Select a generated take to inspect it, or choose its Edit action to make that take the starting point for another revision. You can return to an earlier take when a later edit moves away from the intended direction.
- Did the requested surface or object change as intended?
- Are the fixture proportions, openings, and circulation still visually consistent?
- Did signage, merchandise, or neighbouring materials change unexpectedly?
- Is the image suitable for the design decision you are asking the client to make?
Use the download control on the selected take when you are happy with it. Download important milestones as you work. The original upload may need to be selected again after a reload if it has not been saved as a persistent image.
When to use Design Studio instead
Use Fix Render when your next decision is about an existing image. Use Design Studio when you need to change the store itself: place a fixture, adjust dimensions, change a material in the scene, or save a camera.
The brand library helps you reuse your brand’s fixtures and materials across stores. Upload a brand or fixture book, review extracted details, and approve the items you want to keep. A catalogue can retain partial specifications; placing an item in the scene requires complete placement dimensions and a preview material.
Working from a drawing? Read our floor-plan-to-render guide. Still choosing your starting workflow? Explore the retail design tools overview.


