

What Store Interior does
AI retail store rendering means giving a model your own photo, sketch or 3D view and getting a photoreal image back. Store Interior is the tool in RetailDesign.ai built for that. Upload a photo of a store, a sketch, or a view exported from SketchUp, 3ds Max or Revit. Choose the store type and style. You get a photoreal render that keeps your layout.
It is for designers who already have a plan and need to show it: a pitch image from an untextured model, a client visual from a sketch, or a quick look at one more finish option. Each render takes an estimated 30 to 60 seconds.
Why use it
- It keeps your layout. With Follow my layout on Precise (the default), the render keeps the exact walls, openings and fixture positions of your input, and its camera if the input is a photo or 3D view. Switch to Creative and your image becomes loose inspiration instead.
- It starts from what you already have. A clay model view, a marker sketch or a site photo all work, so you do not rebuild anything to get an image.
- The store type decides the product. Pick Footwear and the fixtures hold shoes. Pick Jewellery and you get rings and watches in glass showcases. The goods are named in the prompt, so you do not get bags in a shoe shop. The product is always generic and unbranded.
- You control the finish. Render style offers Photoreal, CGI, Sketch and Watercolor. Light offers Day, Golden hour, Evening and Night. People can be none, few or many.
- You choose how full the fixtures are. Merchandise is Stocked, Sparse (gallery-like) or Empty, which suits a fixture-first presentation.
- Fast engine when you are short of time. Fast renders in about half the time on a lighter model. It is included with any paid plan and adds 5 credits.
How to use it, step by step
- Upload your image. A photo of a store, a sketch, or a SketchUp, 3ds Max or Revit view. Export the view you would show a client.
- Set Store type and Design style. Store type offers Fashion, Footwear, Beauty, Electronics, Grocery, Homeware, Jewellery, Café and Pharmacy. Design style offers Minimal, Luxury, Industrial, Scandi, Warm natural and Futuristic. Auto is available on both.
- Pick Render style, Light and People. Leave Light on Auto if you have no preference.
- Check Follow my layout and Merchandise. Keep Precise unless you want the tool to reinterpret the room.
- Write the prompt. Name materials and say what must not appear.
- Press Generate. A render costs 25 credits, plus 5 for Fast. Free accounts start with 50 credits.
Try this: upload a clay 3D view of a shoe shop. Prompt: “White oak wall bays, terrazzo floor, warm track lighting. No neon.” Settings: Store type Footwear · Design style Warm natural · Render style Photoreal · Follow my layout Precise · Light Auto · People Few · Merchandise Stocked.
Where it fits in a job
Most designers use Store Interior in one of three places. At pitch stage, a clay view out of the model becomes an image that sells the idea before any finishes are chosen. At review stage, the same view is rendered twice with a different Design style or Light, so the client compares options on the same camera. At sign-off, a Sparse or Empty merchandise setting keeps attention on the fixtures and materials you have specified.
Because the layout is held, you can change the finish without reopening the plan. That is the difference between rendering your design and generating a new one. If a client asks for a different store type or finish, change the chip and run it again.
A real example
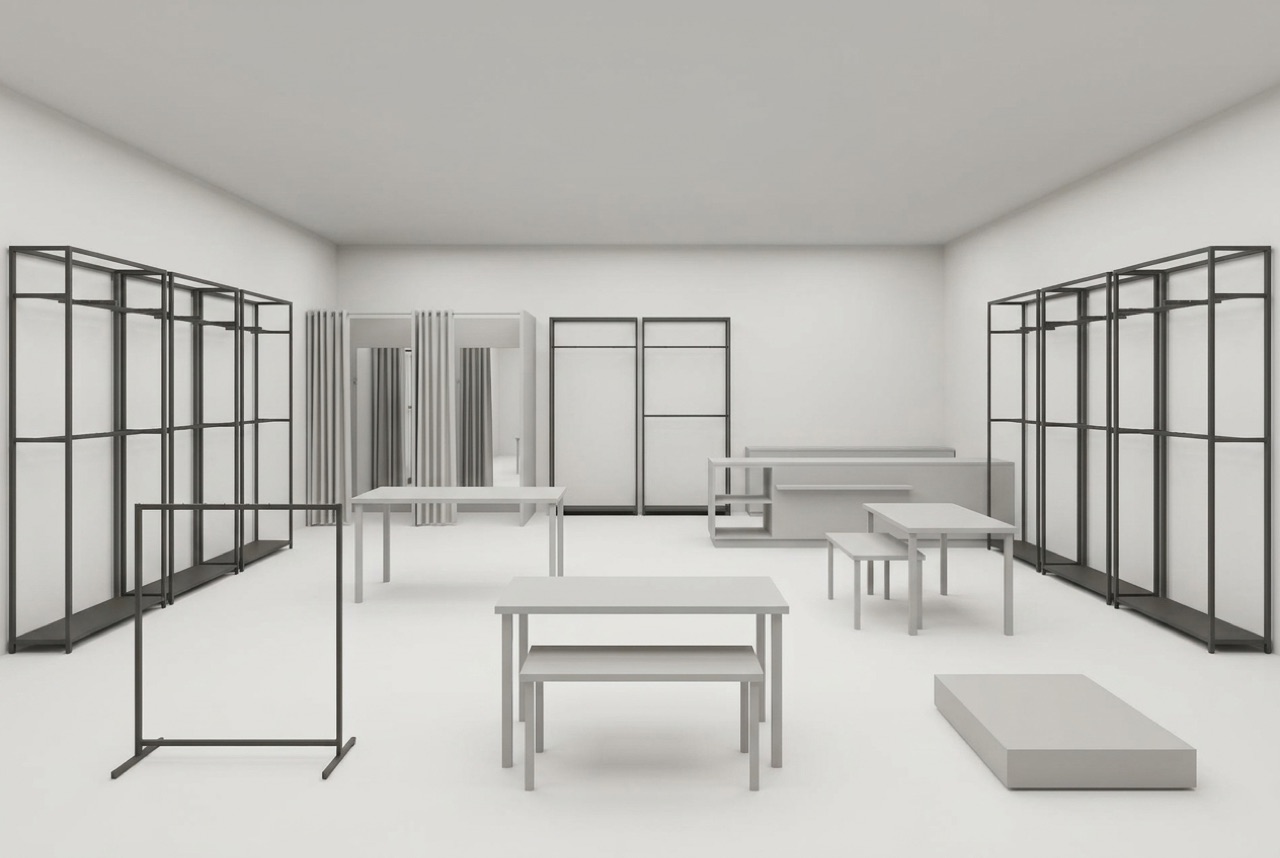
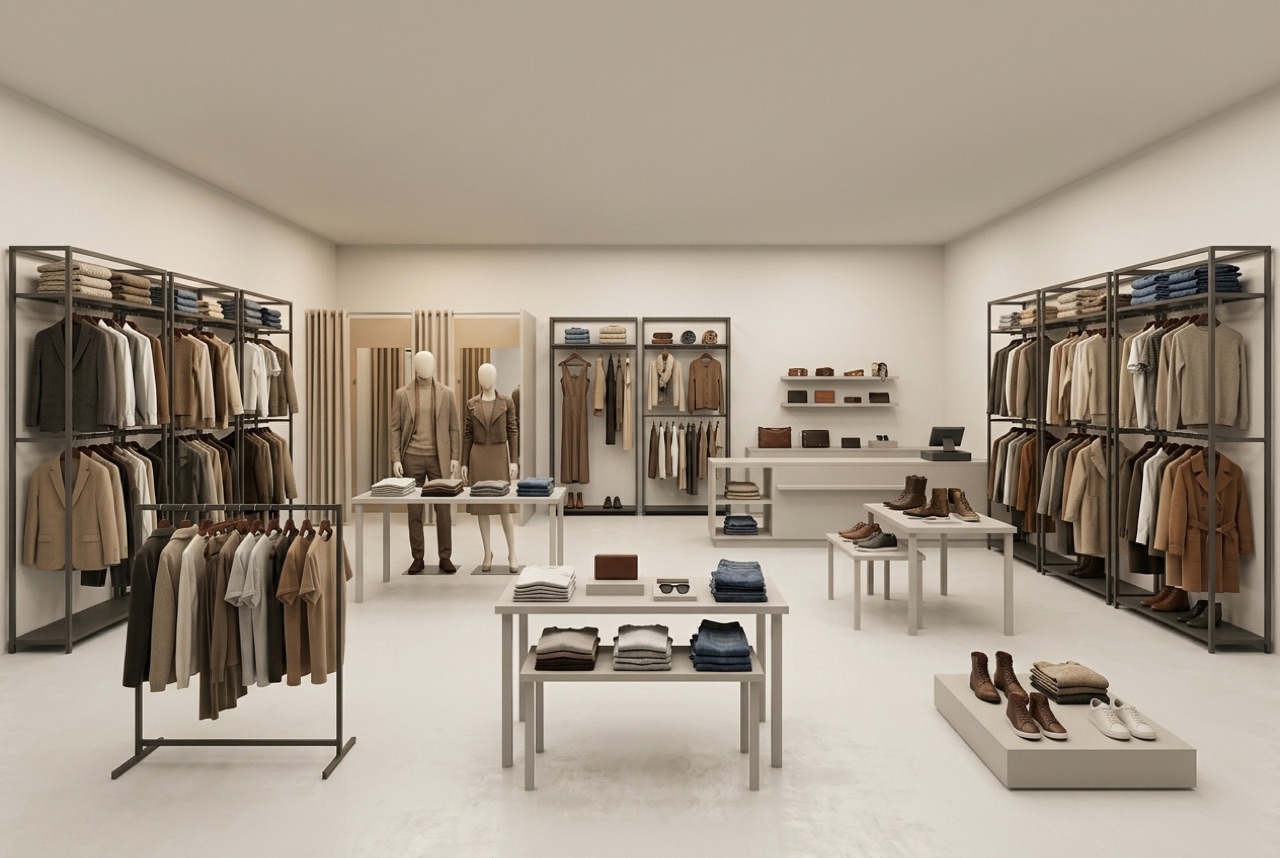
Here is an untextured clay model view of a fashion store, and the render Store Interior made from it. The rails, front tables, plinth and fitting-room curtains sit where they sit in the model.
Tips for better renders
- Name materials, not moods. “Terrazzo floor, white oak bays” gives the model more to work with than “nice and modern”.
- State exclusions plainly. “No neon” or “no pendant lights”. The tool treats exclusions in your brief as hard constraints.
- Send a clean view. Export at the camera you want in the final image, as a photo or 3D view keeps its camera.
- Name your brand if you want it shown. Signage stays blank unless you do.
- Change one thing at a time. For a small fix to a finished render, use Edit Image rather than re-rolling the whole image.
If your starting point is a drawing rather than a view, read how to go from a floor plan to a 3D render. To compare this with other generators, see our 2026 guide to AI store design generators.
What it can't do
A render is an AI image, not a drawing. Small details can move, so compare it with your input before you show it to a client, especially fixture positions and openings. The product is generic, so it will not show your real stock, and signage is blank unless you name your brand. For real dimensions and drawings, build the store in Design Studio.
Ready to try it? Open Store Interior and upload your first view.
FAQ
Can AI turn a 3D model view into a photoreal store render?
Yes. Upload a view exported from SketchUp, 3ds Max, Revit or Lumion, even an untextured clay one, and Store Interior returns a photoreal image. With Follow my layout on Precise, it keeps your camera, walls, openings and fixture positions.
Does Store Interior work from a hand sketch?
Yes. You can upload a sketch as well as a photo or a 3D view. A clearer sketch gives the render more to hold on to, so draw the walls, openings and main fixtures.
How much does a render cost?
A render costs 25 credits, and the Fast engine adds 5 more. Free accounts start with 50 credits. Fast is included with any paid plan and is locked on free accounts.
Will my brand name appear on the signage?
Only if you name it in your prompt. Otherwise signage stays blank and the product shown is generic and unbranded, so nothing invented ends up in front of your client.


