

What image to prompt means
Image to prompt is a render run backwards. Instead of typing a description and getting a picture, you give the tool a picture and get the description: a short prompt for an interior render, covering the store type, layout, fixtures, materials, colours, lighting and camera angle.
It is built for designers who have a reference they like but struggle to put it into words: a competitor's store, a client's Pinterest photo, a site visit snap, or one of your own renders you want to recreate with changes. Prompt from Image is a free tool in the RetailDesign.ai Tools workspace.
Benefits
- It saves the blank page. You do not have to work out how to describe a space. The tool reads the image first and writes the prompt from that reading.
- The prompt is structured for rendering. It is asked to cover store type, layout, fixtures, materials, colours, lighting and camera in one paragraph of 90 words or fewer, which is the information a render needs.
- It is brand-neutral. The tool is told never to include brand names, logos or signage text, so a reference photo does not pull another company's identity into your design.
- You can steer it. An optional box, What to focus on, lets you ask for the materials and the lighting only, for example.
- It costs nothing. It is a free text tool, so there is no credit cost to try a dozen references.
- It leads straight into a render. A button on the result sends the prompt to Store Interior, so you can render it without copying and pasting.
How to use Prompt from Image
- Open the tool from the Tools workspace and choose Prompt from Image, under Write.
- Upload an image. Drag and drop or click to upload a JPEG, PNG or WebP of a store.
- Add a focus if you want one. In What to focus on (optional), type something like “the materials and the lighting”.
- Press Write prompt. It usually takes 5 to 10 seconds.
- Read it, then act. Press Copy to take it elsewhere, or Render with this prompt to open Store Interior with the prompt already filled in.
Try this: upload a photo of a store you admire and type “the materials and the lighting” as the focus. Then, before rendering, change one thing in the prompt, such as the floor finish or the main colour. You now have your own version of the space, in words, in under a minute. If you want to change part of an existing render rather than start again, Fix Render is the better tool.
A real example
This is the example we show in the tool. The input is a photo of a beauty store with white shelving, a service counter and oval wooden tables. The text below was written by Prompt from Image from that photo.
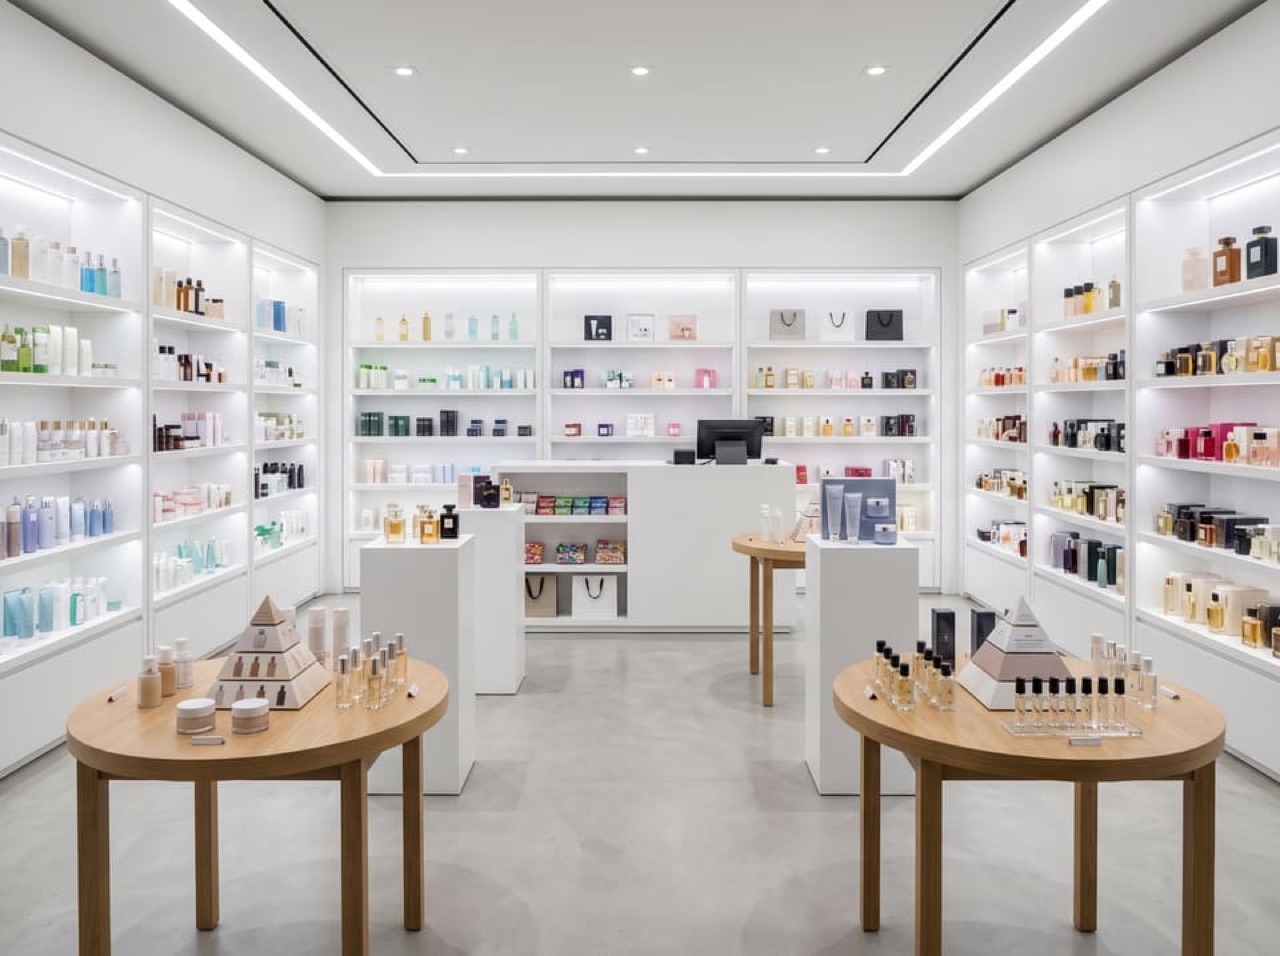
A high-end beauty boutique, long rectangular layout with a central aisle. Floor-to-ceiling white built-in display shelves line all walls, brightly lit by integrated LEDs. A large white service counter is at the back. Two oval light wood display tables and white pedestals are in the foreground. Light grey polished floor. Ceiling has recessed linear and spot lighting. Bright, uniform artificial light throughout. Shot from a slightly elevated, wide-angle perspective looking down the aisle.
Notice what it does. It names the layout, the fixtures, the floor, the ceiling lighting and the camera, in the order a renderer needs them. It also names no brand, even though shelves like these usually carry product from many.
Tips for better prompts
- Use a clear, well-lit photo. A wide shot of the whole space gives a better layout description than a close-up.
- Use the focus box. If the materials are what you love about a reference, say so. The prompt will lean that way.
- Edit before you render. The prompt is plain text. Swap the floor, change the palette, add what the photo lacks.
- Add anything you need to keep out. If a fixture must not appear, state it as a firm rule such as “no X anywhere”. Image models often ignore soft negatives.
- Pair it with a concept. Once the look is clear, write the story behind it with our guide to the concept statement.
Limits
It describes what it can see. It cannot measure a space, tell you a product's finish code, or know what is behind the camera. Small details can be misread, so compare the prompt with your image before you use it.
Any render you make from the prompt is an AI image. Check it carefully before it goes to a client: fixtures, proportions and finishes can drift from what you asked for. For a model with dimensions you control, use Design Studio instead.
Ready to try it on your own reference? Open Prompt from Image and upload a photo.
FAQ
What is image to prompt for interior renders?
It is the reverse of a normal render. You give the tool a picture of a store, and it writes the text prompt that would recreate it: the store type, layout, fixtures, materials, colours, lighting and camera. You can then reuse that prompt to render a new version of the space.
Does Prompt from Image use credits?
No. It is one of the free text tools in the Tools workspace, so it does not spend credits. You do need to be signed in. Rendering with the prompt afterwards uses the normal cost of the render tool you choose.
Will the prompt include the brand name from my photo?
No. The tool is told never to include brand names, logos or signage text, so the prompt describes the space without them. If you want a brand in the next render, add it yourself.
How accurate is the prompt?
It is an AI reading of a picture, so treat it as a strong first draft. Read it against your image, fix anything it got wrong, and only then render. It describes how a space looks. It does not measure anything.


