

What the 2D colour plan is
A colour rendered floor plan is a flat, top-down plan with colour on the floors and fixtures, the kind you pin to a presentation board. To make one with AI, upload your CAD export, PDF screenshot or scan to Floor Plan → Render, leave Output on 2D colour plan, choose a store type and style, and press Generate. The walls are kept exactly as drawn. The tool estimates 30 to 60 seconds.
This post is about that flat plan. If you want a 3D bird's-eye view of the same drawing, the Output chip also has that option, and we cover it in floor plan to 3D render with AI.
What you get from it
- The walls stay as drawn. The instruction is a top-down, flat plan with walls exactly as drawn. Your structure is the part that does not change.
- It is a flat plan, not a picture of a room. In 2D mode the photoreal instructions are left out on purpose, because they fight a flat drawing. You get a presentation plan, not a perspective.
- You decide how much is drawn. Fixtures shown offers None (an empty floor), Outline (simple outlines) and Detailed.
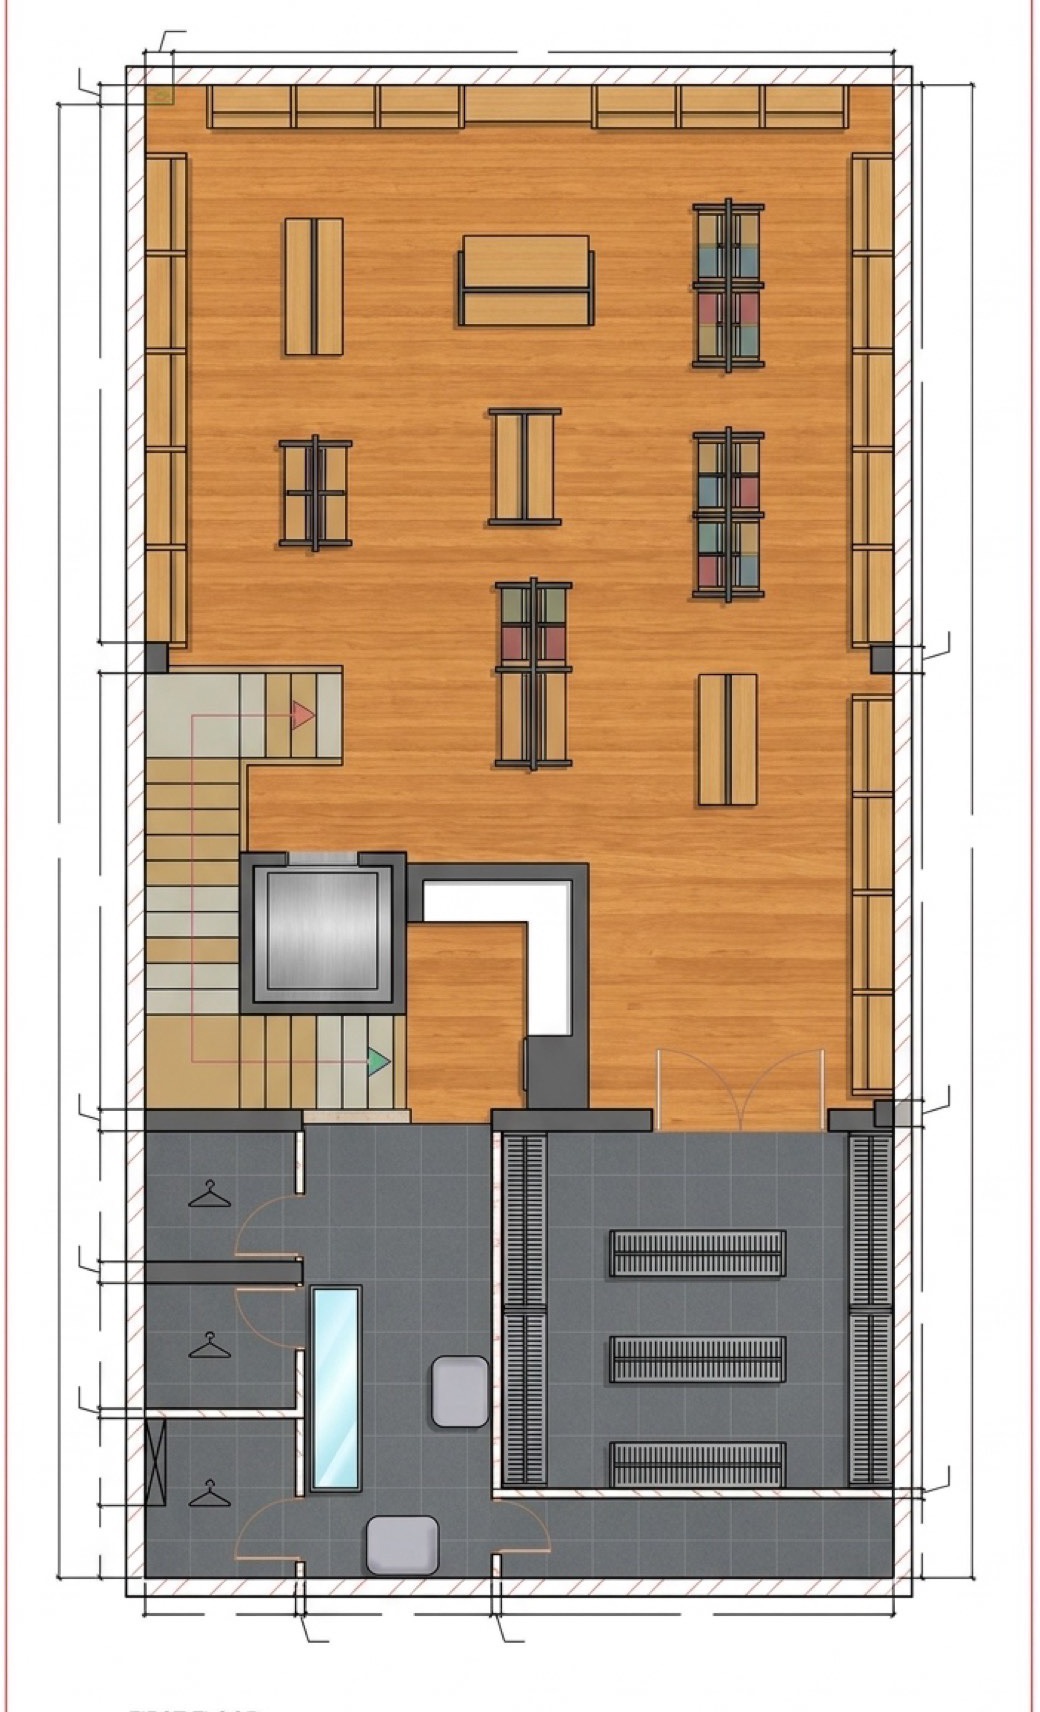
- The fixtures are retail ones. An unlabelled shell plan could be furnished as anything, so the tool names the retail fixtures outright: perimeter wall shelving, central display tables and gondolas, a cash counter near the entrance and a stockroom at the back, with fitting rooms for fashion and footwear.
- You can set floors by area. The prompt takes lines such as “oak floor in the sales area, grey tiles in the stockroom”.
- It takes the plan you already have. A CAD export, a PDF screenshot or a scan all work as the input image.
How to use it, step by step
- Prepare the plan. Export the drawing as an image, or screenshot the PDF. A clean, high-contrast export helps.
- Open the tool and upload it under Input image.
- Set Output to 2D colour plan.
- Pick the Store type and Design style. The store type decides which fixtures are drawn. The style sets the palette.
- Set Fixtures shown: None, Outline (the default) or Detailed.
- Write the prompt for floors and zones, then press Generate. Fast is a paid-only engine and adds 5 credits.
| Fixtures shown | What you get |
|---|---|
| None | An empty coloured floor, no fixtures |
| Outline | Fixtures as simple outlines |
| Detailed | Fixtures drawn in detail |
Try this prompt: “Oak floor in the sales area, grey tiles in the stockroom.” Output: 2D colour plan · Store type: Fashion · Design style: Warm natural · Fixtures shown: Outline.
A real example
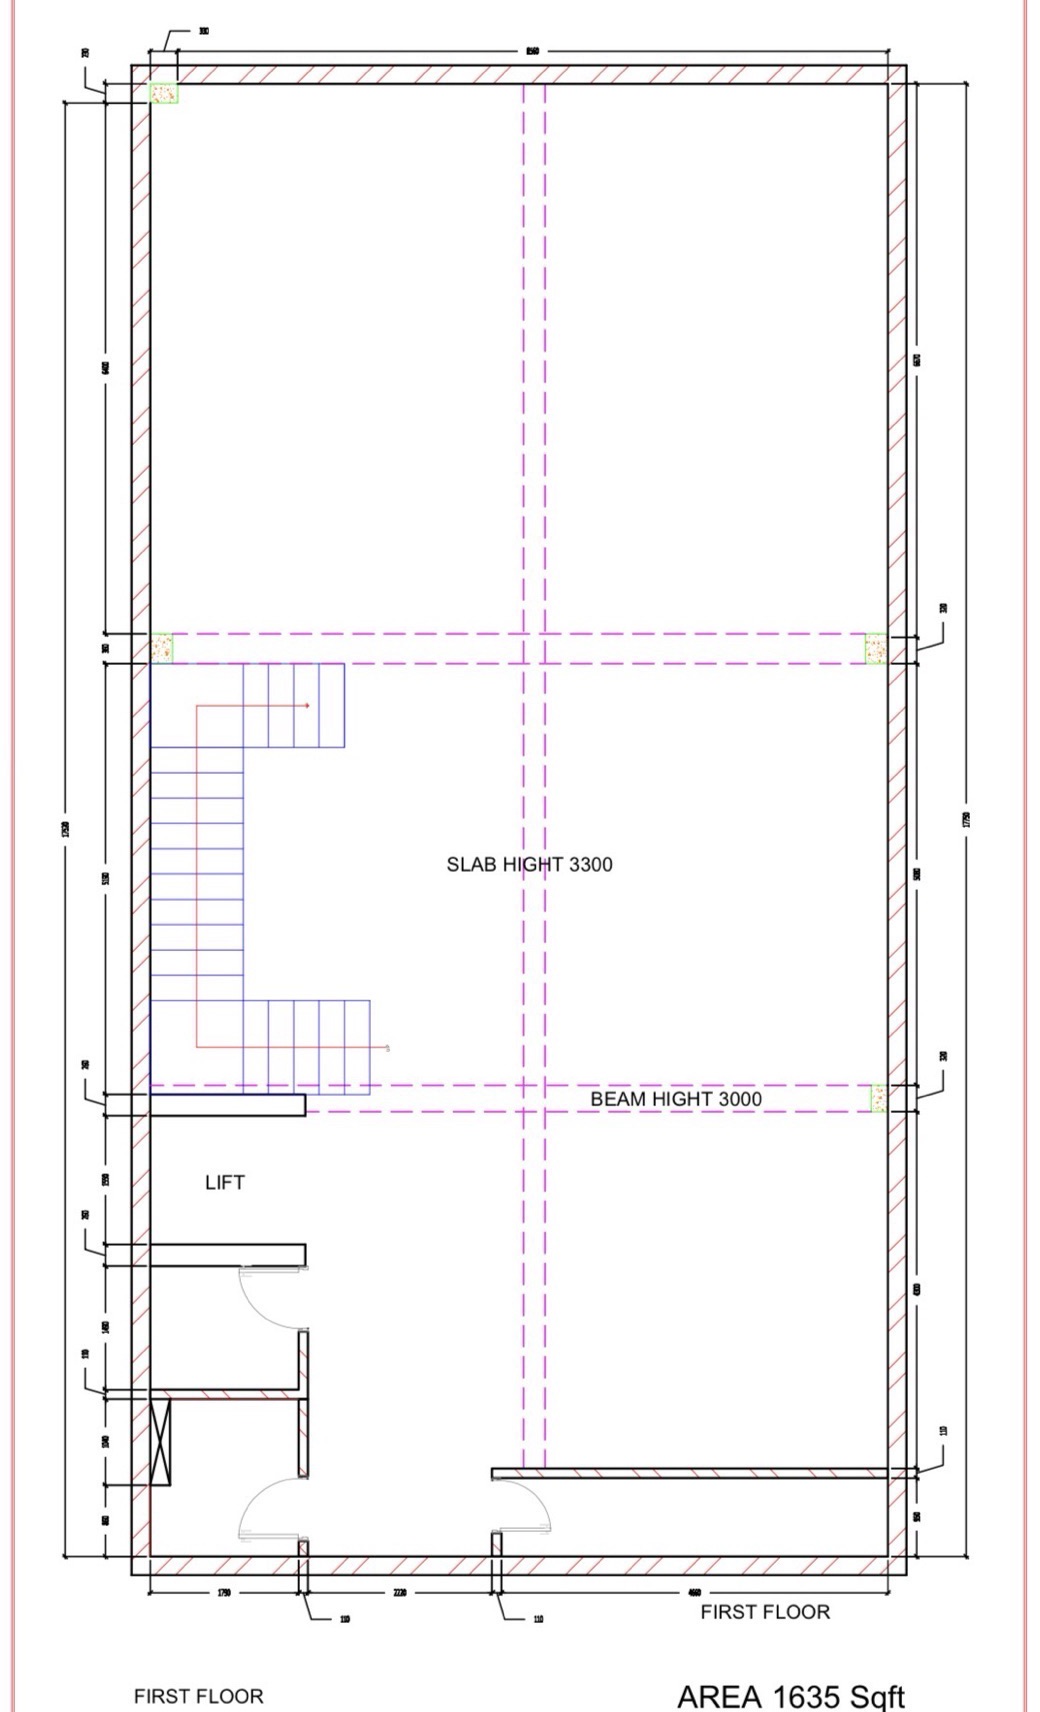
On the left is a CAD shell plan of a first floor, with stairs, a lift and a few partitions. On the right is the coloured 2D fashion store plan the tool made from it.
Tips for a good plan
- Clean up before you export. Hide layers you do not want read as walls, such as hatching for services or grids.
- Keep the whole plan in frame and upright, so every wall is visible.
- Choose the store type honestly. A fashion plan gets fitting rooms. A grocery plan does not.
- Name zones in the prompt. If the stockroom is at the back, say so and say what the floor is.
- Start with Outline. It keeps the plan readable. Use Detailed only when the plan is large enough to carry the detail.
For a view of how fixtures, aisles and sightlines work before you commit to a layout, read our retail store layout design guide.
What it can't do
It does not design a measured layout. The fixtures are a suggestion for the store type you choose, not a dimensioned arrangement, and they are not drawn to scale. Use the plan to present a direction, and draw the real layout in CAD. The tool also asks for no text, labels or annotations, so do not expect a labelled drawing. As with any AI image, compare the walls with your drawing before it goes to a client.
To edit a layout properly in 2D and see it in 3D, use Design Studio. To see the same plan as a furnished 3D render, read our floor plan to 3D render guide.
Have a plan waiting? Open Floor Plan → Render. A render costs 25 credits, and free accounts start with 100.
FAQ
How do I colour a CAD floor plan with AI?
Upload a CAD export, PDF screenshot or scan to Floor Plan → Render, choose the 2D colour plan output, pick a store type and style, and press Generate. You get a coloured top-down plan with the walls exactly as drawn.
Does the plan keep my walls exactly as drawn?
That is the instruction: walls exactly as drawn, top-down and flat. Compare the result with your drawing anyway. It is an AI image, not a CAD file.
Are the fixtures on the plan to scale?
Treat them as a suggestion. The tool fits the space out as the store type you choose, with wall shelving, central tables and gondolas, a cash counter and a stockroom, but it does not measure them. Use it to present an idea, then draw the real layout in CAD.
Can I get a 3D view from the same plan?
Yes. The Output chip also offers a 3D view, a bird's-eye render of the plan. Our guide on floor plan to 3D render covers that route.


