

What Edit Image does
To edit a render with AI and change just one thing, upload the render, describe the change and say what must not move. Edit Image is the tool for that. Its tagline is “change one thing, keep the rest”. You can upload a render or a photo, or open a result from another tool, then compare before and after.
It is for the last mile of a visual: the client likes the render but wants a different floor, or you spot a fixture that should be oak, not walnut. Re-rolling the whole image risks losing what was already right. An edit is the safer route. A run takes an estimated 20 to 45 seconds.
Why use it
- You work on the image you already like. The edit starts from your render, not from a new generation of the whole scene.
- A field for what must not move. Keep unchanged is a dedicated input, for example “the camera angle, signage and all display fixtures”. Say it there, not buried in a sentence.
- It works on any image. A render from Store Interior, a render from another tool, or a photo. You are not tied to one source.
- Up to three takes. The Takes chip offers 1, 2 or 3 versions of the edit at once, so you can pick the cleanest.
- A before and after to compare. You see the original beside the result, which makes it easy to spot anything that drifted.
- The price is per take. 20 credits each, so you decide how many tries to spend. Free accounts start with 50 credits.
How to use it, step by step
- Upload the image, or open a result from another tool in Edit Image.
- Describe the change in the What should change? box. One change, stated plainly: “Change the floor to warm oak wood.”
- Fill in Keep unchanged. List the things that must stay: the camera angle, the signage, the fixtures.
- Choose Takes. Start with 1. Use 2 or 3 when the change is tricky.
- Press Generate, then compare each take with the original.
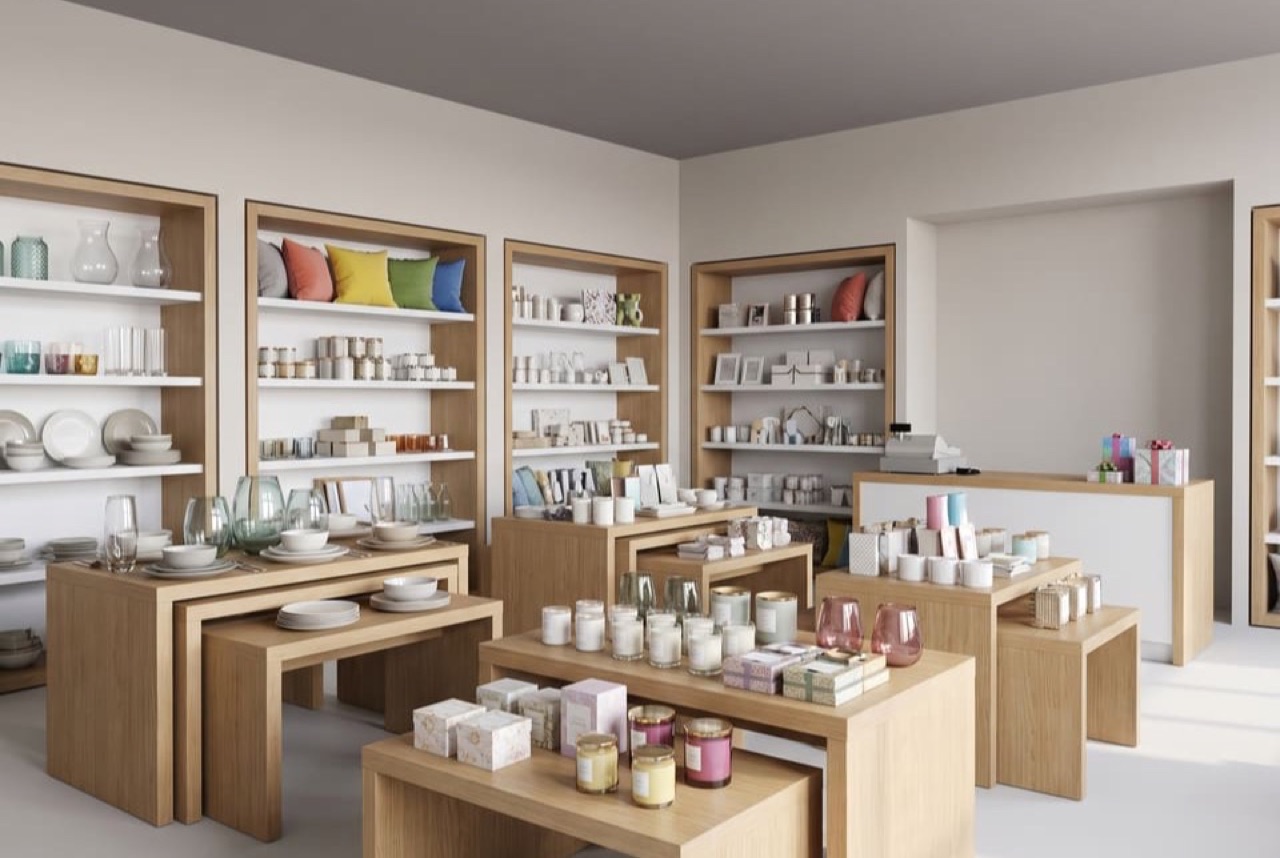
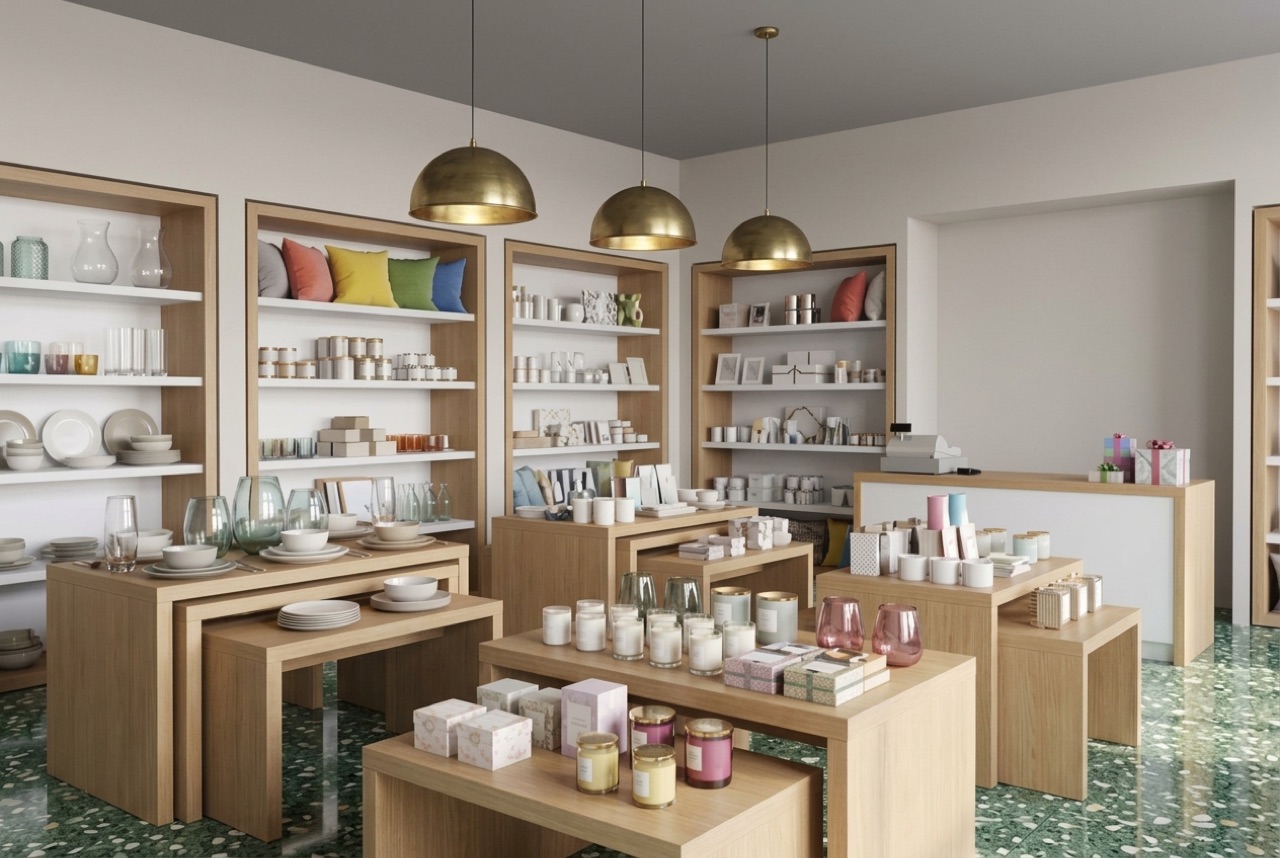
Try this: upload a finished homeware store render. What should change?: “Change the floor to polished green terrazzo with white and cream chips, and hang three brass dome pendant lights above the central display tables.” Keep unchanged: “the camera angle, the wall shelving and the display tables.” Takes: 2.
What counts as one thing
Edit Image works best on changes that are easy to describe and easy to see. Good candidates are a floor material, a wall colour, a lighting fitting, a piece of furniture swapped for another, or the time of day. A harder request is anything that depends on the whole composition, such as moving a fixture to a different part of the room. That is a layout change, and it belongs in the plan.
A useful habit is to write the change as a before and after sentence in your head: the floor was grey, now it is green terrazzo. If you can say it that simply, the edit is probably small enough. If you need a paragraph, split it into two edits and run them one after the other.
A real example
Here is a homeware store render, and the same image after one edit. The floor and lighting changed. The shelving, tables and product are where they were.
Tips for clean edits
- One idea per edit. A floor and a light fitting are fine together if they are separate surfaces. Five changes at once are not.
- Be concrete. “Polished green terrazzo with white and cream chips” gives a result you can judge. “Make the floor nicer” does not.
- Always fill Keep unchanged. It costs a few words and protects the parts the client has already approved.
- Use more takes for hard changes. Three takes cost 60 credits, still less than redoing a whole scene several times.
- Edit the best base image. If the render itself is wrong, go back to Store Interior or Redesign a Space and fix the brief.
To see how these renders are made in the first place, read our guide to AI retail store rendering from a photo, sketch or 3D view, or how to redesign an existing shop from a photo.
What it can't do
Edit Image is an AI edit, not a layer in a drawing file. Image models can shift details you did not mention, so check each take against the original, especially fixtures, openings and anything that carries text. It will not make a technical change you could measure, such as moving a counter by exactly 300 mm. For work that must be dimensionally right, change the model in Design Studio. Compare the result before you show it to a client.
Have a render waiting on one more change? Open Edit Image and try it.
FAQ
How do I edit one thing in an AI render without changing the rest?
Upload the render, describe the single change in the What should change field, and list what must not move in Keep unchanged. Try up to three takes at once and compare them with the original.
How much does Edit Image cost?
20 credits per take. Choosing 3 takes costs 60 credits. Free accounts start with 50 credits.
Can I edit a render made in another tool?
Yes. You can upload any render or photo, or open a result from another tool in Edit Image.
Why did something else change in my edit?
Image models can shift details you did not mention. Name what must stay in Keep unchanged, ask for one change per edit, and compare each take with the original before you share it.


