

What Design Studio is
Design Studio is editable 3D retail store design software, currently in beta. You build a store at real dimensions, place fixtures from your brand's approved library, edit it in plan and in 3D, render any view, and export a PDF drawing set, all inside one project. It is the plan-based part of RetailDesign.ai, built for commercial interior architects and retail designers.
It is different from an image tool. A render is a picture. In Design Studio the store is a model you can change, so a move of one fixture changes the plan, the render and the quantities. It appears in the Tools list as 3D Store and Floor Plan → 3D Store, and both open the same studio at /design-studio.
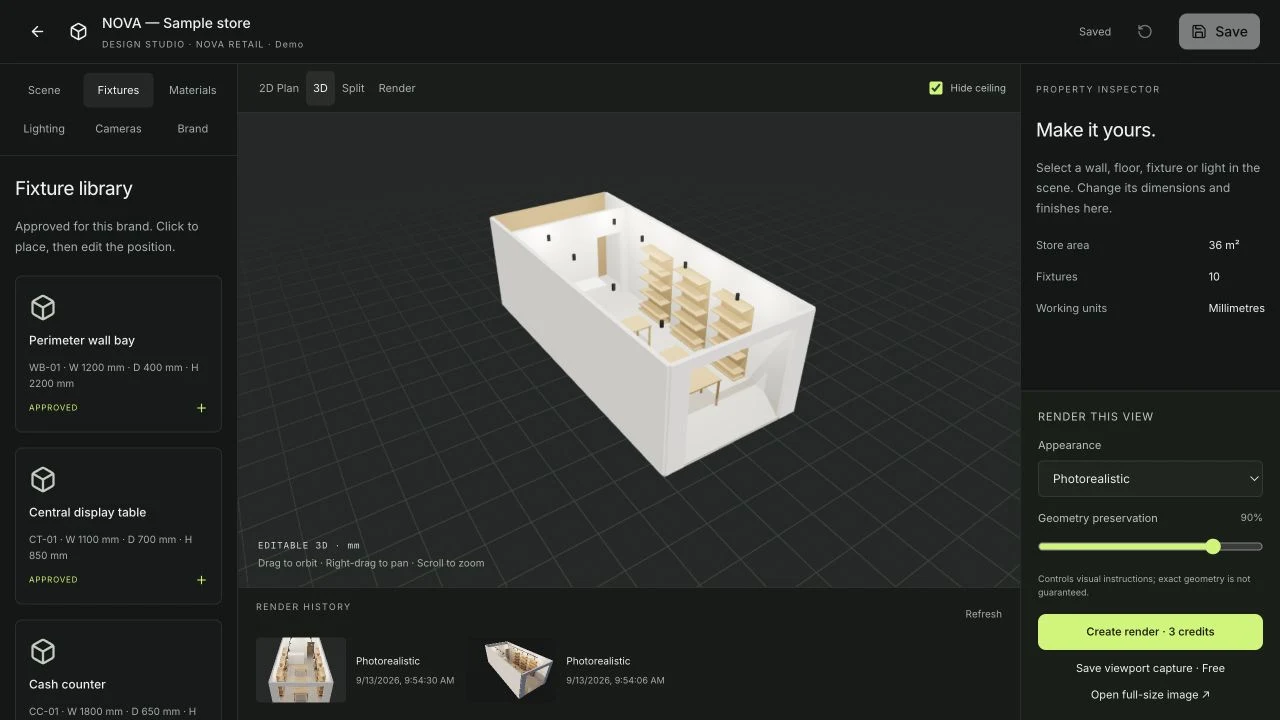
Benefits
- One model, many outputs. The same store gives you a 3D view, a 2D plan, renders, a PDF drawing set and quantities. You change it once.
- Three ways to start. A furnished layout, an empty shell from your site measurements, or an uploaded site drawing. You do not need a CAD model to begin.
- Your brand's fixtures, not generic ones. The Fixture library shows items approved for the brand, with their code and dimensions. Click to place, then edit the position.
- You stay in control of what is approved. Approval in the brand library is recorded by you, and knowledge the AI inferred is kept separate from approved standards.
- Services drawings are a start. Lighting, power and HVAC sheets are laid out from your real fixtures and walls, so the first draft for your engineer is already coordinated with the layout.
How to use it, step by step
1. Start a store
Open Design Studio and choose Start from. There are three options.
- Furnished layout. Pick a store type (Fashion & apparel, Footwear, Beauty & cosmetics, Electronics, Convenience & grocery, or Homeware & gifts) and an approximate size: Small (about 40 m², 5 × 8 m), Medium (about 95 m², 8 × 12 m) or Large (about 190 m², 12 × 16 m). You get generic wall bays, floor fixtures and a cash counter with clear aisles. It is a rule-based layout, not AI, and you can move, swap or delete anything.
- Empty shell. Enter store width, store depth, ceiling height and entrance width in millimetres. You get a rectangular shell with 120 mm walls.
- From a site drawing. Upload a PDF, PNG or JPEG (up to 30 MB). Use Analyze drawing if you want help, confirm the scale with one known distance, review the walls and floor outline, tick the review box and press Create editable 3D store. It does one reviewed page per upload. Our guide to floor plan to 3D covers the plan-reading side in depth.
2. Edit the scene
The left panel has six tabs: Scene, Fixtures, Materials, Lighting, Cameras and Brand. The centre switches between Plan, 3D, Side by side and Render views, and you can hide the ceiling to see in. Select a wall, floor, fixture or light and the property inspector on the right lets you change its dimensions and finishes. Check aisle widths against our retail store layout guide before you commit.
3. Connect your brand, render, export
Pick a brand under More options to load its materials, fixtures and store formats. When the layout is right, render a view and open the drawing set. All three are covered below.
Try this: start with Furnished layout, Beauty & cosmetics, Medium. Open the Fixtures tab, place one more display table from the library, and set its dimensions in the inspector. Switch to Side by side and render the view. In about ten minutes you have a store you can talk through with a client, and every fixture in it is still editable.
The brand library
The brand library holds reusable Materials, Fixtures and Store formats for each brand, so you build once and use them across stores. You can also import a brand book to extract items from a document. Each fixture card shows its code, size and an approval status, such as APPROVED.
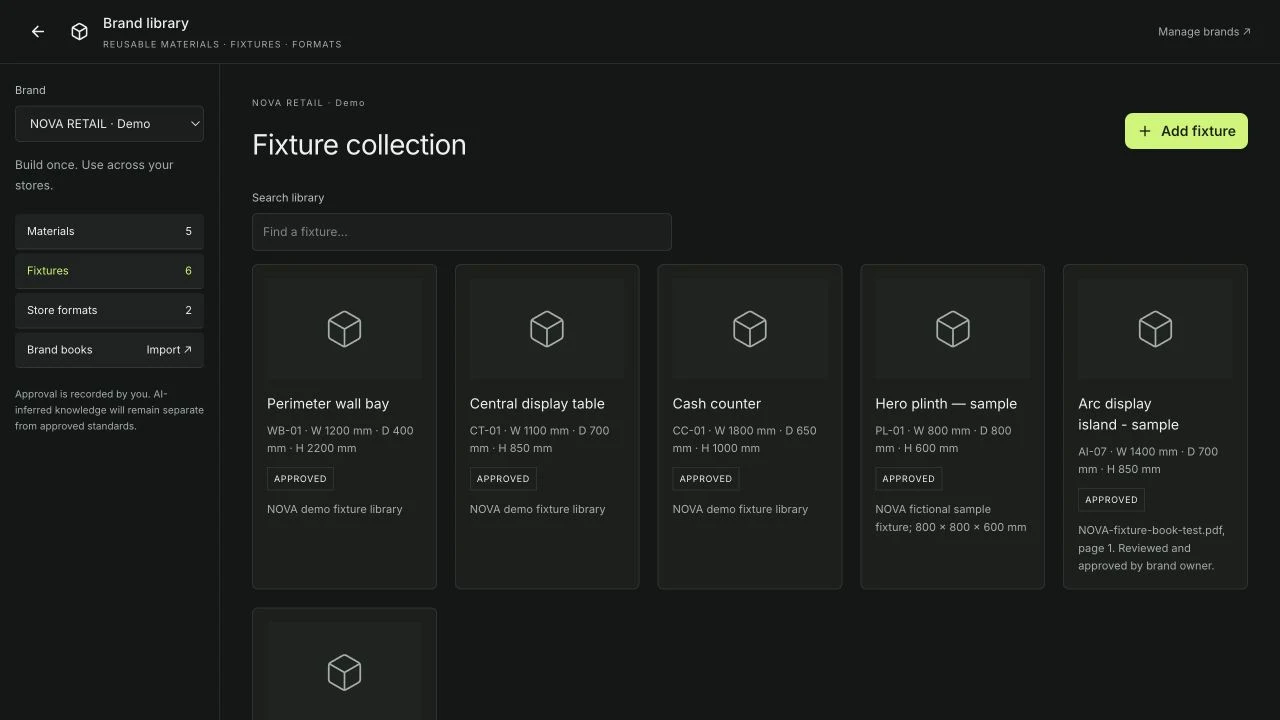
An item can be saved with partial information, but placing a fixture needs complete placement dimensions and a preview material. If you work from a brand's fixture book, review what was extracted before you approve it. Manage the library at /design-studio/library.
Rendering a view
The Render this view panel turns the current 3D view into a photoreal image. You choose an appearance (the default is Photorealistic) and a Geometry preservation level, which was 90% in the screenshot below. The studio notes that this setting controls visual instructions and that exact geometry is not guaranteed. A render costs 25 credits on a credit account, and a free account starts with 50 credits, so it covers two. The button shows the price on your account before you press it. Save viewport capture is free, and past renders are listed under Render history.
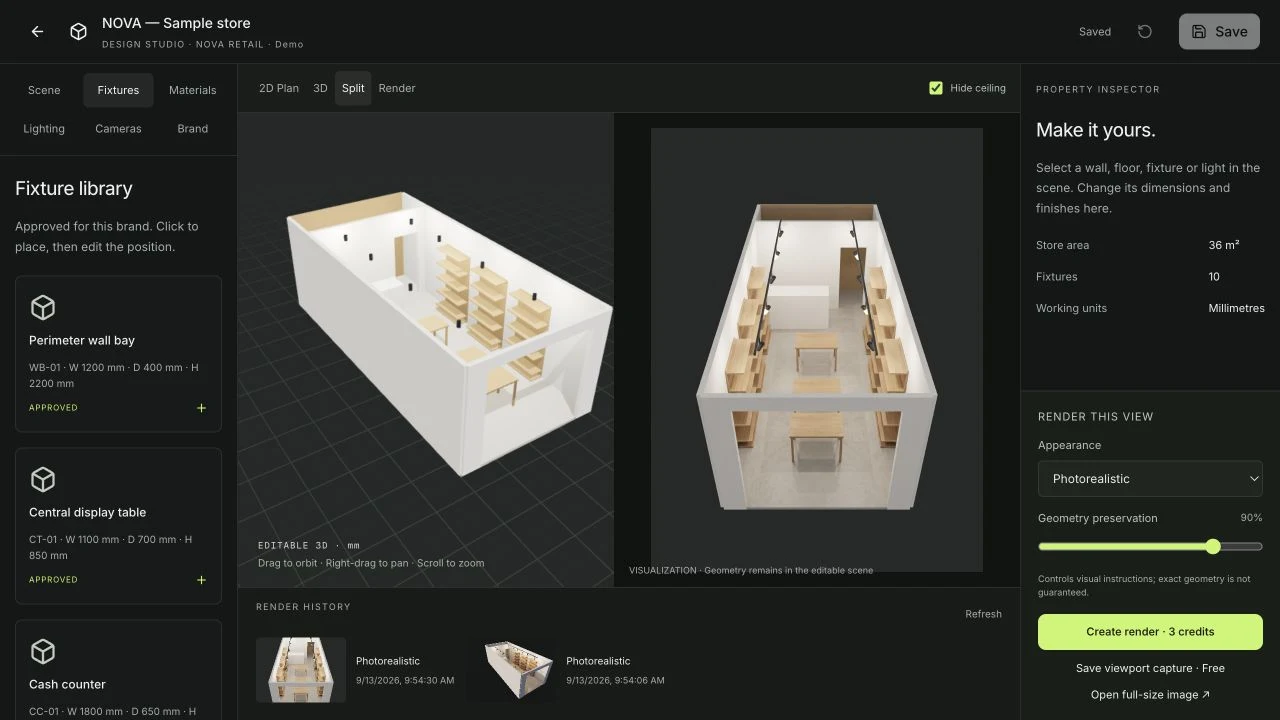
A render is an AI image of your model. Compare it with the 3D scene before you show it, because details can drift. If you need to adjust the picture, not the store, use Fix Render.
The drawing set
Press Drawing set and the studio builds a set of A3 landscape sheets from your model, which you can page through and save as a PDF.
| Sheet | What it shows |
|---|---|
| G-001 | Cover sheet and drawing index |
| A-101, A-102 | Floor plan; fixture layout and schedule |
| A-201 | Reflected ceiling plan |
| E-101, E-102 | Lighting layout; power and data layout |
| M-101 | HVAC air distribution layout |
| FP-101 | Fire and life safety layout |
| A-301 onwards | Interior wall elevations, four to a sheet |
| A-401 | Storefront facade elevation |
The lighting, power and HVAC sheets are designed by AI from your actual layout, with a rule-based layout as a fallback, and the layout is checked against the geometry. These are design intent, not engineered documents, and each sheet says so. Your electrical and mechanical engineers must still do the calculations and certify the design.
Once the model is stable, pull quantities from it with Quantities (BOQ).
Tips
- Enter real measurements early. The drawings and quantities inherit the dimensions you set.
- Upload the best drawing you have. A clean PDF with a printed dimension gives a better scale check than a phone photo.
- Approve a few fixtures well. A short library of correctly specified items beats a long one with gaps.
Limits
Design Studio is a concept and presentation tool. It does not replace your CAD package, fabrication drawings or a structural, electrical or mechanical engineer. Floor plan analysis is AI-assisted and can misread a drawing, which is why you confirm the scale and review the geometry before the 3D store is created. Renders are AI images and are not guaranteed to match the model exactly. Project limits for your plan apply.
Ready to build one? Open Design Studio, or start from the Tools workspace.
FAQ
Is Design Studio free to try?
You can open it from a signed-in account and start a store. Building, editing and saving viewport captures do not spend render credits. Photoreal renders do: 25 credits each on a credit account, and a free account starts with 50 credits. Project limits for your plan still apply.
Can I turn a floor plan into a 3D store?
Yes. Choose From a site drawing, upload a PDF, PNG or JPEG, confirm its scale with one known distance, check the walls and floor outline, then create the editable 3D store. You review the geometry first, so the result is a model you have checked, not a guess.
Are the lighting, power and HVAC drawings engineered?
No. They are design intent. The AI lays out lighting, power and HVAC from your actual store layout, with a rule-based fallback if it cannot, and each sheet says an engineer must still design, size and certify the services.
Does the render match my 3D model exactly?
Closely, but not to the millimetre. There is a Geometry preservation setting, and the studio itself notes that it guides the image and does not guarantee exact geometry. The editable 3D scene stays the source of truth. Check any render against it before a client sees it.


